Did you know 550 cord sustains five hundred fifty pounds, making it stronger than some climbing ropes? Such strength fits Jack’s active lifestyle perfectly. As we prepare for “springing forward” this weekend, Jack definitely requires updated accessories.
Finding high-quality pet items often proves difficult or expensive. This is why paracord crafting offers an ideal solution. This specific DIY dog collar guide simplifies the process for everyone.
Handmade gifts show genuine love for your canine companions. These nylon strings provide vibrant colors that match the blooming flowers outside. Constructing this gear takes very little effort but yields amazing results.
Personalized equipment stands out at the local park. Neighbors will surely admire your handiwork during those longer evening strolls. Enjoy creating something special that lasts through many seasons.
Your pup will appreciate the comfort of this handmade design. Every outdoor adventure feels better with reliable gear. Jack will look his best while exploring the neighborhood this spring.
Key Takeaways
- 550 cord provides extreme strength for active pets.
- Custom gear allows for unique colors and patterns.
- Spring weather requires durable, water-resistant equipment.
- Handmade projects save money while ensuring quality.
- This process remains simple for every skill level.
Why Paracord Makes the Perfect Dog Collar Material
The versatility and strength of paracord make it a superior choice for crafting dog collars. When considering materials for a dog collar, factors such as durability, comfort, and customization are paramount. Paracord excels in all these areas, making it an ideal choice for dog owners who want a collar that is both functional and personalized.
Unmatched Strength and Durability
One of the primary reasons paracord stands out as a material for dog collars is its unmatched strength and durability. Paracord, originally used in parachute suspension lines, is designed to withstand significant stress and strain. This inherent strength translates well to withstanding the rigors of daily use with dogs, who can often be energetic and unpredictable. A paracord collar can endure the wear and tear of regular use, including pulling on the leash and exposure to various environmental conditions.
Cost-Effective Compared to Store-Bought Options
Another significant advantage of using paracord for dog collars is its cost-effectiveness. While high-quality store-bought collars can be expensive, making a paracord collar can be a more budget-friendly option. The initial investment in paracord and necessary hardware can be less than buying a premium collar, and the DIY approach allows for adjustments and repairs without additional cost.
Endless Customization Possibilities
Paracord offers endless customization possibilities, allowing dog owners to create a collar that is truly unique. With a wide range of colors available, owners can choose a paracord that matches their dog’s personality or their own personal style. Additionally, various weaving patterns can be employed to create different textures and designs, further enhancing the collar’s customization.
Emergency Utility of Paracord
Beyond its use as a dog collar, paracord has emergency utility. In survival situations, paracord can be used for a variety of tasks, such as creating a makeshift leash, securing items, or even as a tow line. This multi-functionality adds an extra layer of value to a paracord dog collar, making it a practical choice for outdoor enthusiasts.
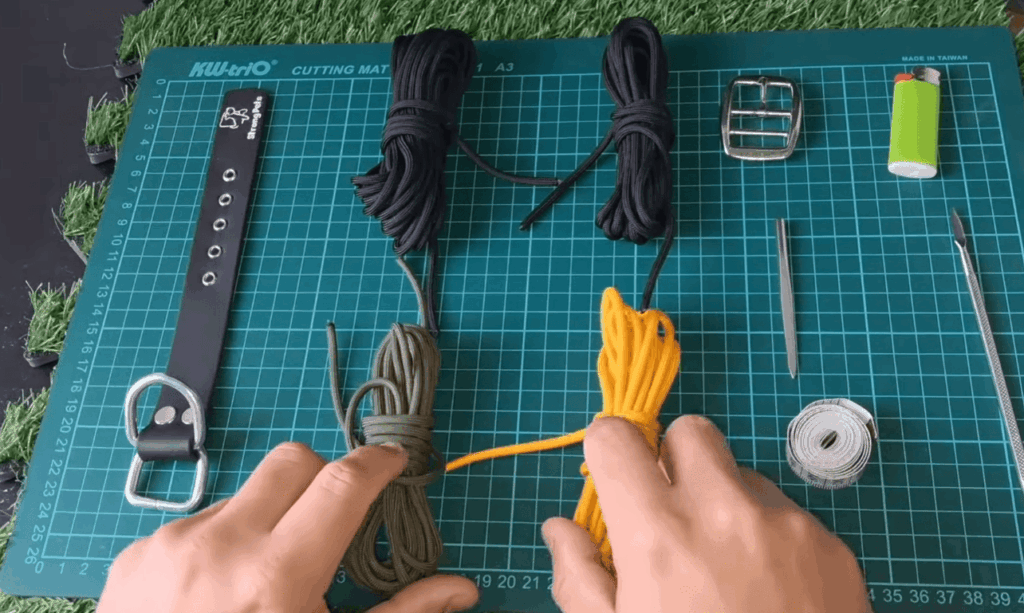
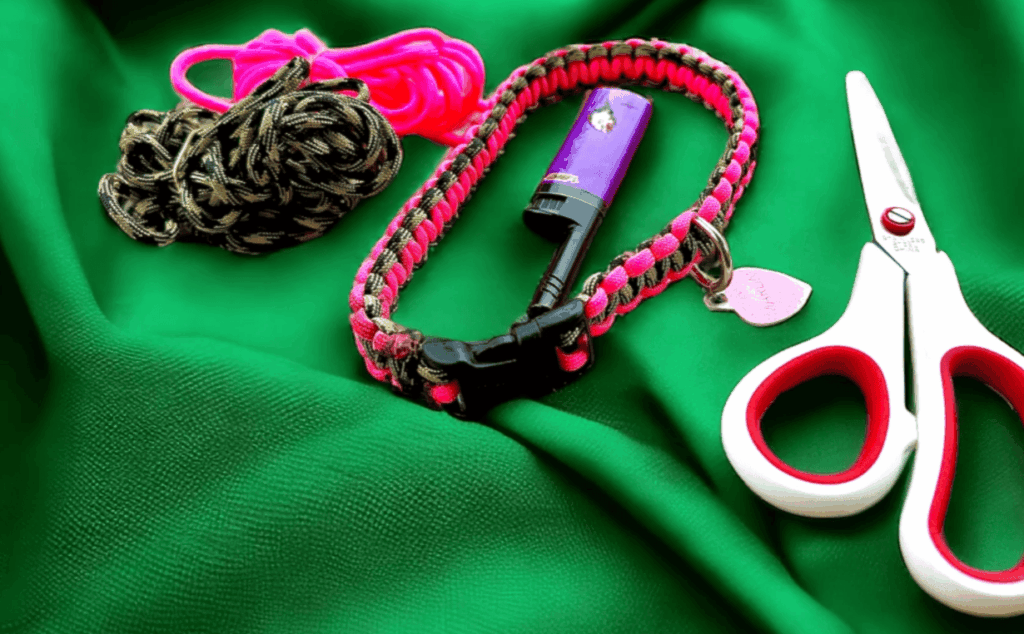
Gathering Your Materials: Complete Supply List
To create a durable and stylish paracord dog collar, you’ll need to gather a few key materials. The quality of your supplies directly affects the final product, so it’s worth investing in good-quality components.
Paracord Selection: Type and Length
The type and length of paracord you choose are crucial for your dog collar. 550 paracord, known for its strength and durability, is a popular choice. The length required will depend on your dog’s neck size and the weaving pattern you’ve chosen.
For a standard adult dog collar, you might need between 7 to 10 feet of paracord, but this can vary. It’s always a good idea to have a bit extra to work with.
Side Release Buckles and Size Guidelines
Side release buckles are a practical choice for paracord dog collars due to their ease of use. When selecting a buckle, ensure it’s the right size for your dog’s neck. Buckles typically come in various sizes, so measure your dog’s neck to choose the appropriate size.
D-Rings for Leash Attachment
A sturdy D-ring is necessary for attaching a leash to your dog’s collar. Look for D-rings made from durable materials like stainless steel or heavy-duty plastic.
Optional Additions for Enhanced Functionality
Depending on your needs, you might want to add some optional features to your paracord dog collar. These can include reflective tracers for visibility at night or personalized name tags.
| Material | Description | Where to Buy |
|---|---|---|
| Paracord | Durable cordage for the collar | Michaels, Walmart, Home Depot |
| Side Release Buckles | Practical buckles for easy on/off | Craft stores, Online retailers |
| D-Rings | For leash attachment | Pet stores, Online retailers |
| Scissors | For cutting paracord | Office supply stores, Kitchen drawers |
| Lighter | For sealing paracord ends | Various retail stores |
Essential Tools for Making Your Collar
To craft a paracord dog collar, you’ll need a few essential tools that make the process smoother and more efficient. Having the right equipment not only simplifies the crafting process but also ensures a professional finish.
Measuring Tape and Scissors
A measuring tape is crucial for accurately measuring your dog’s neck size, ensuring a comfortable and proper fit. Scissors are necessary for cutting the paracord to the required length. It’s advisable to use sharp, dedicated scissors to prevent fraying the paracord.
Lighter or Heat Source for Sealing
A lighter or another heat source is used to seal the ends of the paracord, preventing them from fraying. This step is crucial for maintaining the collar’s integrity and appearance over time. Some crafters also use a blowtorch for a more precise seal.
Hemostats or Needle-Nose Pliers
Hemostats or needle-nose pliers are handy for gripping small objects and can be particularly useful when threading the paracord through the buckle or D-ring. These tools provide the precision needed for detailed work.
Additional tools that can be useful, though not essential, include a paracord needle or crochet hook for weaving, and a teaspoon for finishing off the ends. A paracord jig can also be helpful for maintaining even tension and pattern consistency.
- Paracord needle or crochet hook
- Teaspoon (for finishing)
- Paracord jig
By having these tools at your disposal, you’ll be well-equipped to create a paracord dog collar that’s both functional and stylish.
Measuring Your Dog’s Neck for a Perfect Fit
Measuring your dog’s neck is the first step towards creating a paracord collar that is both comfortable and functional. Achieving the right fit is crucial for your dog’s comfort and the collar’s effectiveness.
The Two-Finger Rule for Proper Sizing
A good rule of thumb for ensuring your dog’s paracord collar is not too tight is the two-finger rule. This means you should be able to fit two fingers comfortably between the collar and your dog’s neck. This rule helps prevent the collar from being too constricting while still being secure enough to serve its purpose.
Taking Accurate Neck Measurements
To take an accurate measurement, wrap a flexible measuring tape or a piece of string around your dog’s neck, just behind the ears and around the neck area where the collar will sit. Make sure it’s not too tight or too loose. If using a string, mark the point where it overlaps, then measure the length against a ruler. This gives you your dog’s neck circumference.
Calculating Total Paracord Length Needed
A general guideline for calculating the total paracord length needed is to add a certain amount to your dog’s neck measurement. A common rule is to allocate about a foot of paracord for every inch of the collar’s length. For example, if your dog’s neck measures 16 inches, you would need approximately 16 feet of paracord.
Adjusting for Different Dog Breeds
Different breeds have varying neck sizes and shapes. For instance, Greyhounds have longer, thinner necks, while Bulldogs have thicker, more muscular necks. Adjust your measurements accordingly, considering the breed-specific characteristics of your dog. Here’s a simple table to help guide adjustments for different breeds:
| Breed Type | Neck Size Adjustment | Paracord Length Adjustment |
|---|---|---|
| Small Breeds (e.g., Chihuahua) | -1 to 0 inches | -1 foot |
| Medium Breeds (e.g., Cocker Spaniel) | 0 inches | Standard calculation |
| Large Breeds (e.g., German Shepherd) | +1 to 2 inches | +1 to 2 feet |
| Giant Breeds (e.g., Great Dane) | +2 to 3 inches | +2 to 3 feet |
By considering these factors and making the necessary adjustments, you can create a paracord collar that fits your dog perfectly, ensuring both comfort and durability.
Selecting the Best Paracord for Your Project
Choosing the right paracord is crucial for making a durable and comfortable dog collar. The type of paracord you select can affect the overall quality and functionality of the collar.
When it comes to paracord, the most commonly used type for dog collars is the 550 paracord. Understanding its specifications is essential for making an informed decision.
Understanding 550 Paracord Specifications
The 550 paracord, also known as Type III paracord, is a versatile and durable cord that is widely used for various applications, including dog collars. It is characterized by its strength and resistance to wear and tear.
Key Specifications of 550 Paracord:
| Specification | Description |
|---|---|
| Material | Nylon |
| Minimum Breaking Strength | 550 pounds |
| Number of Strands | 7 inner strands |
| Diameter | Approximately 4mm |
Choosing Between Type III and Type IV
When selecting paracord, you may come across Type III and Type IV. The main difference between them lies in their construction and strength.
Type III paracord, or 550 paracord, has 7 inner strands and a minimum breaking strength of 550 pounds. Type IV paracord has 9 inner strands and a higher minimum breaking strength.
Consider the following when choosing between Type III and Type IV:
- The size and strength of your dog
- The intended use of the collar
- Your personal preference for thickness and durability
Color Coordination and Design Planning
Color coordination is an important aspect of designing your paracord dog collar. You can choose a single color or multiple colors to create a unique design.
When planning your design, consider the following:
- Choose colors that complement each other.
- Consider the color of your dog’s fur and the surroundings they will be in.
- Think about the overall aesthetic you want to achieve.
Using a double set-up in your design, like in the original Graf Wutz and Honey Bee designs, will result in a wider collar. This can be a great option if you prefer a broader look or need extra durability.
Preparing Your Workspace and Materials
To ensure a smooth and enjoyable paracord dog collar making experience, preparation is key. A well-prepared workspace not only streamlines the crafting process but also reduces the likelihood of errors.
Organizing Your Supplies
Begin by gathering all necessary materials and tools within easy reach. This includes your paracord, buckles, D-rings, scissors, lighter or heat source, and hemostats or needle-nose pliers. Organizing your supplies in a logical and accessible manner saves time and minimizes frustration during the crafting process.
Consider using a container or tray to keep small parts like buckles and D-rings from getting lost. A tidy workspace contributes to a more efficient and enjoyable crafting experience.
Cutting Paracord to Length
Cutting your paracord to the correct length is a critical step. For a single-color collar, fold the paracord in half to determine the midpoint. For a two-color collar, you’ll need to cut two separate lengths of paracord. It’s essential to measure carefully to avoid running out of paracord mid-project or having too much excess.

| Collar Size | Paracord Length (Single Color) | Paracord Length (Two Colors) |
|---|---|---|
| Small | 4 feet | 2 x 2 feet |
| Medium | 5 feet | 2 x 2.5 feet |
| Large | 6 feet | 2 x 3 feet |
Sealing Cord Ends to Prevent Fraying
To prevent the paracord ends from fraying, you’ll need to seal them. For a single-color paracord, simply melt the folded end. For two-color paracords, melt the end of each color and press them together until they are firmly attached. Sealing the ends not only prevents fraying but also gives your project a professional finish.
“A clean finish is just as important as a sturdy one. Sealing your paracord ends ensures that your collar remains durable and looks great over time.”
Using a lighter or heat source, carefully melt the paracord ends. Be cautious not to burn the paracord or surrounding materials.
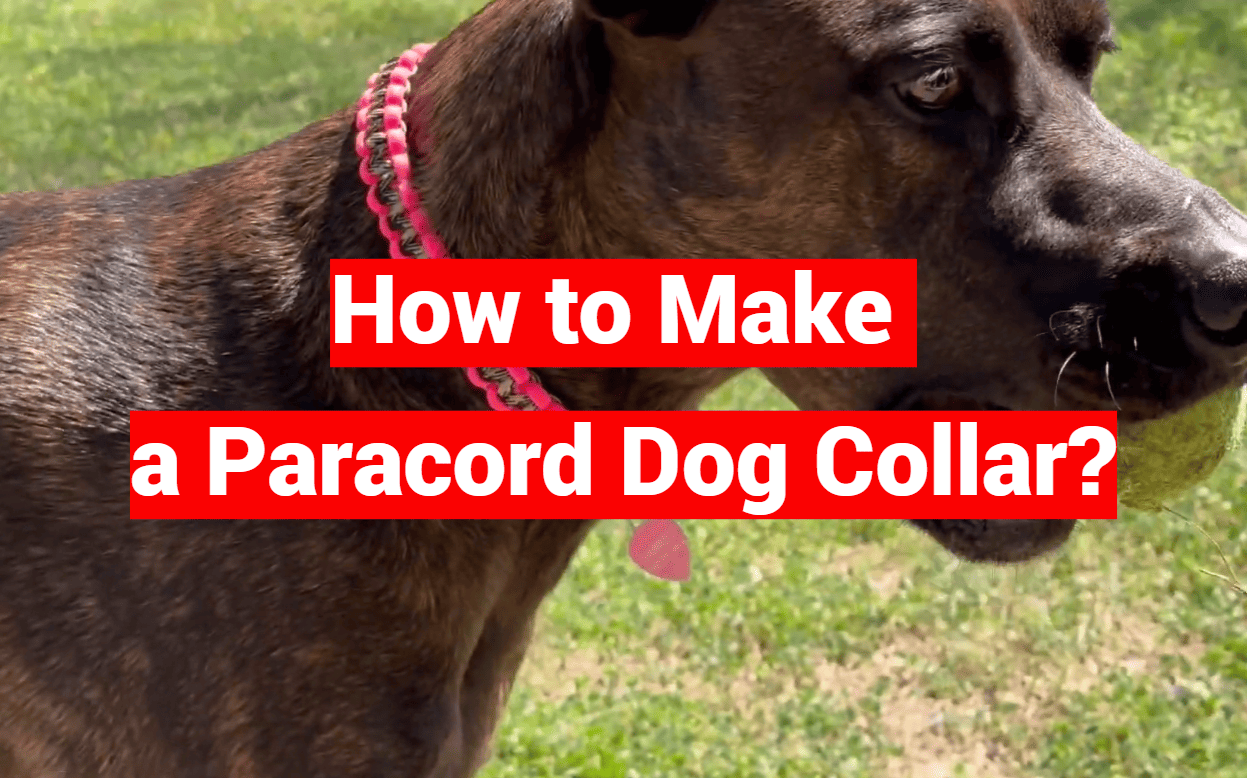
How to Make a Paracord Dog Collar: Complete Step-by-Step Guide
Making a paracord dog collar is a straightforward process when broken down into manageable steps. This guide will walk you through each stage, from securing the paracord to the buckle to finishing the ends.
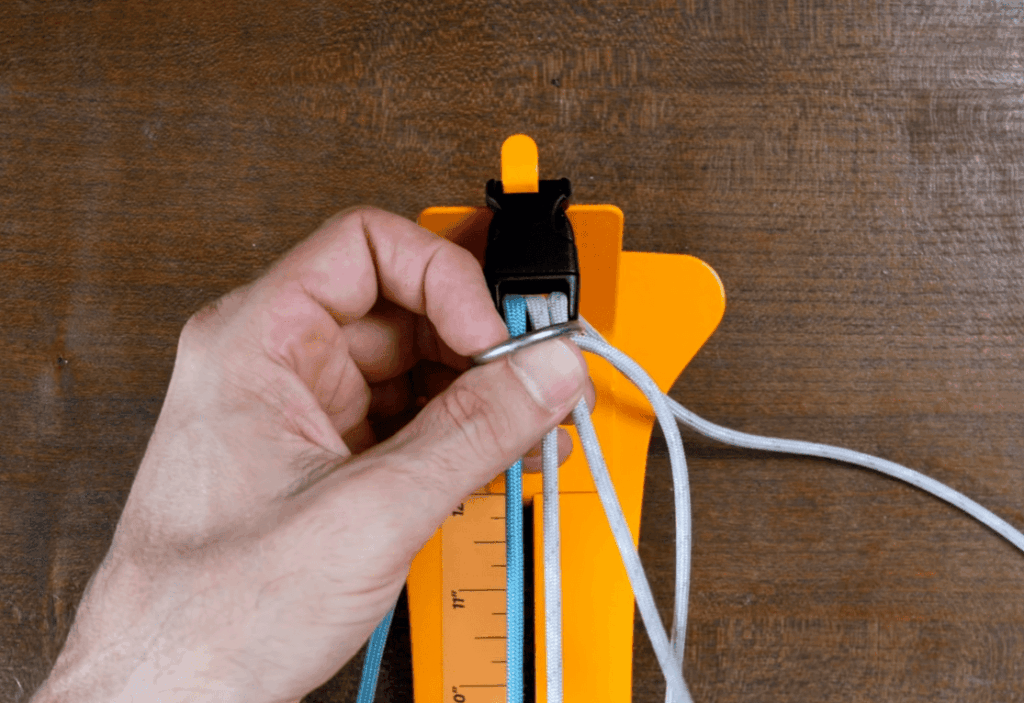
Step 1: Securing Paracord to the Female Buckle
Begin by threading the paracord through the female buckle. Fold the paracord over and pass the ends through the loop you just created, securing it with a simple knot. Pull tight to ensure a snug fit.
Step 2: Threading Through the Male Buckle
Next, thread the paracord through the male buckle. Make sure it’s not twisted and lies flat. This step is crucial for the overall functionality of the collar.
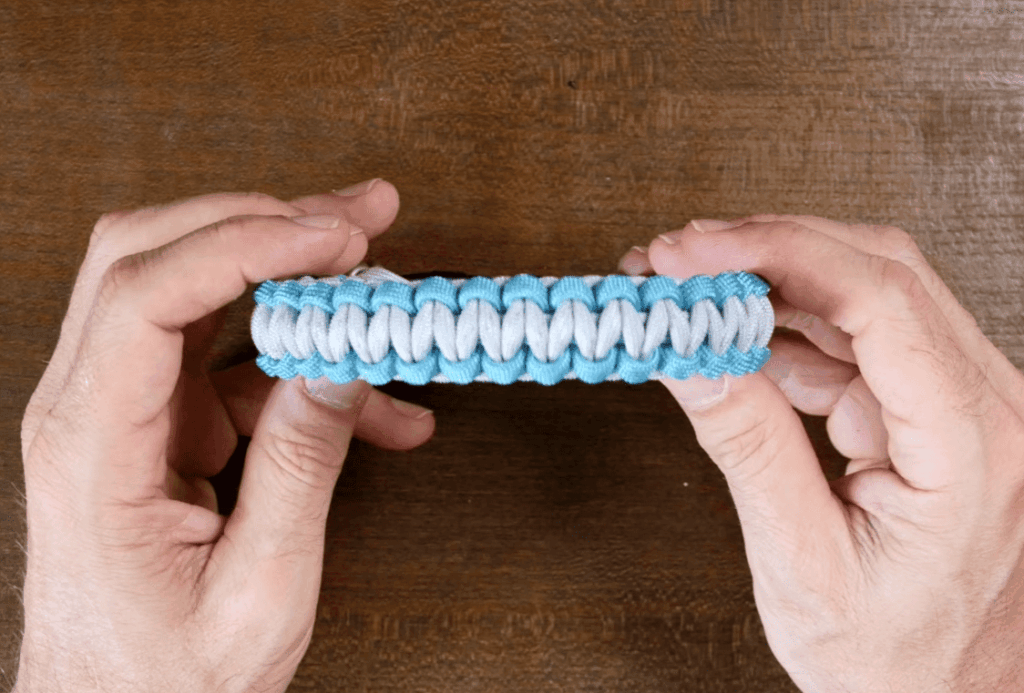
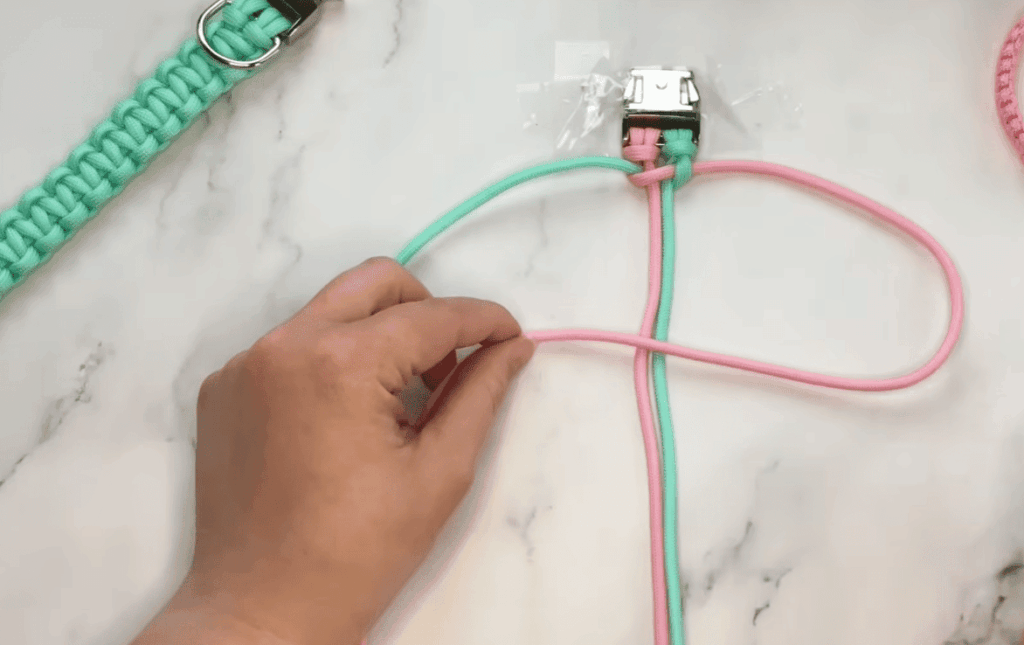
Step 3: Starting Your Cobra Weave
The cobra weave is a popular pattern for paracord collars due to its strength and aesthetic appeal. To start, cross the right cord over the left, then take the left cord and pass it under the right, and finally, bring it up and through the loop you just created.
Step 4: Creating the Right-Side Knot
Continue the cobra weave by taking the right cord and crossing it over the middle two cords. Then, take it behind the left cord. This step is essential for creating the signature cobra pattern.
Step 5: Creating the Left-Side Knot
As you continue the weave, take the right color and cross it over the middle two cords and behind the left color. This action creates the foundation of the cobra weave pattern.
“The key to a neat cobra weave is maintaining even tension.”
Step 6: Maintaining Even Tension Throughout
As you weave, gently pull the cords to tighten the weave. Even tension is crucial for a professional-looking finish.
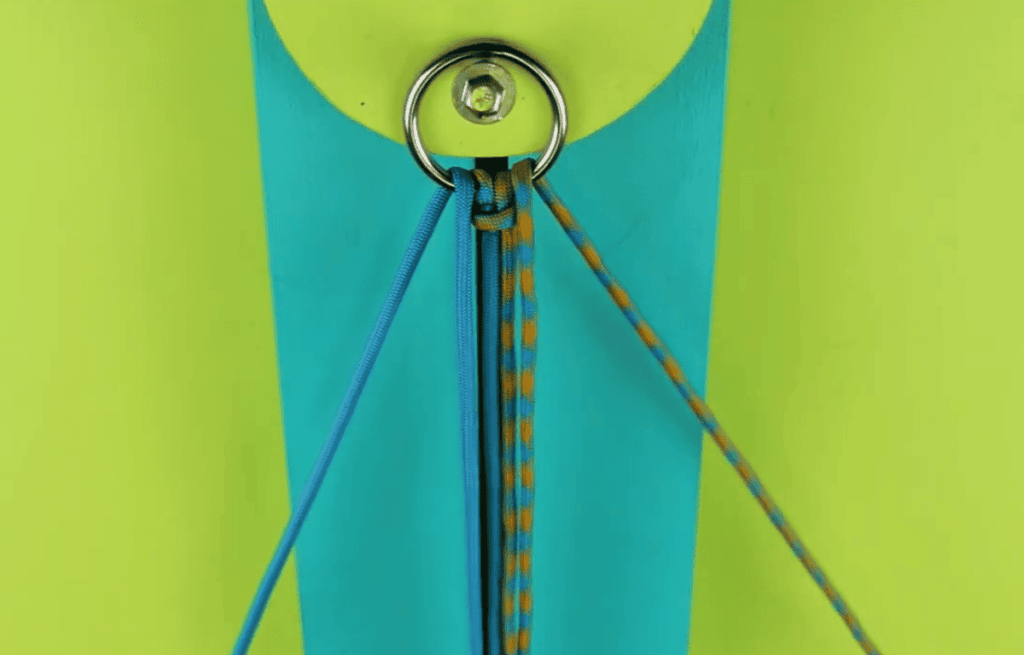
Step 7: Adding the D-Ring Midway
To add a D-ring for leash attachment, simply thread the paracord through the ring midway through your weaving process. Create a “4” with the left color over the middle and place the color on the right over top the left, as described in the detailed instructions.
Step 8: Completing the Weave Pattern
Continue the cobra weave until you reach the desired length. Make sure to keep the tension even and the pattern consistent.
Step 9: Finishing and Securing the Ends
Once you’ve completed the weave, secure the ends by threading them through the male buckle and tucking them under the weave. Use a lighter to melt the ends, ensuring they are sealed and won’t fray.
By following these steps, you’ll have a durable and stylish paracord dog collar. Remember, practice makes perfect, so don’t be discouraged if it takes a few attempts to get the hang of it.
Popular Weaving Patterns Beyond the Basic Cobra
Beyond the basic cobra weave, numerous paracord weaving patterns can enhance the aesthetic and functionality of dog collars. Crafters can explore various techniques to create unique and durable collars that stand out.
King Cobra Weave for Extra Thickness
The King Cobra weave is a popular choice among paracord enthusiasts due to its thickness and durability. It involves a double layer of the cobra weave, making it ideal for larger dogs or for those who prefer a more substantial collar.
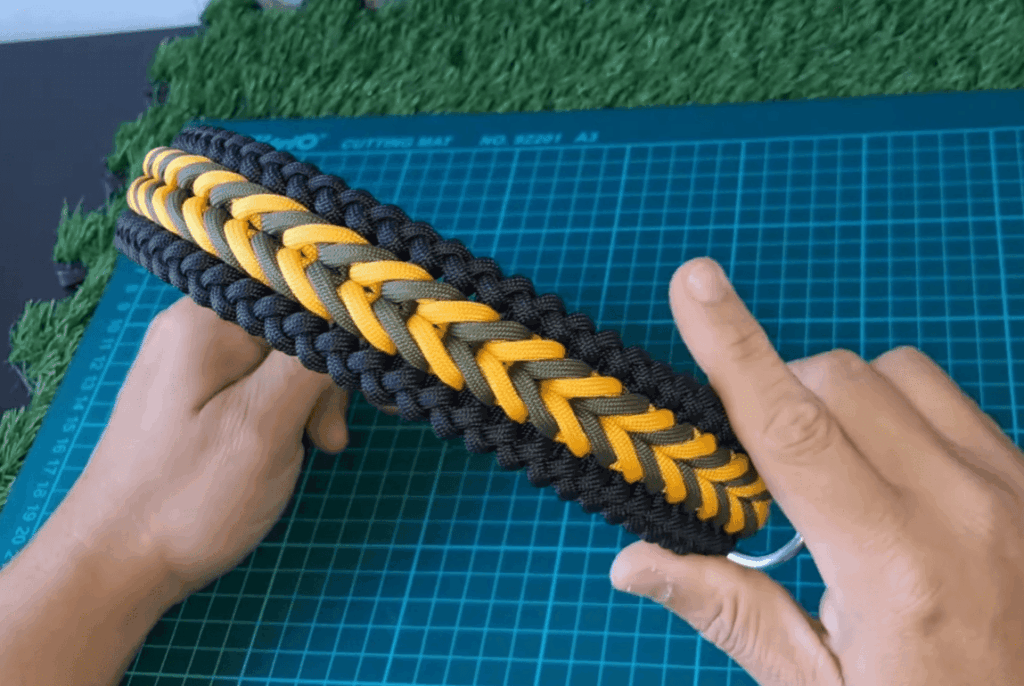
Fishtail Braid Pattern
The Fishtail braid pattern adds a touch of elegance to paracord dog collars. This intricate design requires patience and practice but results in a visually appealing and sturdy collar.
Snake Knot Design
The Snake knot design is another versatile pattern that can be used to create stylish and functional dog collars. It’s known for its simplicity and the smooth, continuous look it provides.
Trilobite Weave for Advanced Makers
For experienced crafters, the Trilobite weave offers a challenging yet rewarding project. This complex pattern results in a highly textured and robust collar that is sure to impress.
To help you decide which pattern suits your needs, here’s a comparison table:
| Weaving Pattern | Difficulty Level | Thickness | Aesthetic Appeal |
|---|---|---|---|
| King Cobra Weave | Intermediate | Thick | High |
| Fishtail Braid | Advanced | Medium | Very High |
| Snake Knot | Beginner | Thin | Medium |
| Trilobite Weave | Advanced | Thick | High |
Examples of creative names for your paracord dog collars include “Knot the Benno’s Happiness,” “Knot the Luna’s Fly Trap,” “Knot the Graf Wutz,” and “Knot the Honey Bee,” showcasing the fun and personalized touch you can add to your creations.
Professional Finishing Techniques
To ensure your paracord dog collar is both functional and visually appealing, mastering professional finishing techniques is essential. These techniques not only enhance the collar’s durability but also its overall appearance.
Melting Ends Without Damaging the Buckle
One crucial step in finishing your paracord collar is melting the ends to prevent fraying. This must be done carefully to avoid damaging the buckle. Using a lighter or heat source, gently melt the paracord ends. It’s advisable to practice this technique to achieve the perfect melt without compromising the buckle’s integrity.
Tip: Keep the heat source at a safe distance to avoid burning the paracord or the buckle.
Creating Smooth, Flat Finishes
A smooth finish is not just aesthetically pleasing; it also ensures comfort for your dog. To achieve this, make sure to tighten the weave evenly and adjust the tension as you go. A well-tensioned weave results in a flat, smooth finish.
Tucking Ends for a Clean Appearance
Tucking the paracord ends into the weave is a neat way to finish your collar. This technique hides the ends, giving your collar a clean and professional look. It requires some patience, but the result is worth the effort.
Testing Collar Strength Before Use
Before putting the collar on your dog, it’s crucial to test its strength. Pull the collar with significant force to ensure it can withstand the rigors of regular use. This step is vital for ensuring your dog’s safety.
| Finishing Technique | Description | Importance Level |
|---|---|---|
| Melting Ends | Prevents fraying and gives a clean finish | High |
| Creating Smooth Finishes | Enhances comfort and appearance | High |
| Tucking Ends | Gives a professional and clean look | Medium |
| Testing Collar Strength | Ensures safety and durability | Very High |
For a visual guide on finishing techniques, you can refer to video tutorials that demonstrate these methods in detail. For instance, a video showing the finishing off of a slightly different knot can provide valuable insights into the process.
Creative Customization Ideas
Personalize your paracord dog collar with these innovative and practical customization ideas that will make your pet’s collar stand out. Whether you’re looking to add functionality, style, or a personal touch, these ideas will help you create a truly unique collar.
Adding Reflective Tracers for Night Visibility
Incorporating reflective tracers into your paracord dog collar is a great way to enhance visibility during nighttime walks. These tracers reflect light, making your dog more visible to drivers and others. To add reflective tracers, simply weave them into your paracord pattern. This not only adds a functional element but also a stylish touch to the collar.
For example, you can use reflective paracord or thread a reflective yarn through your weave. This simple addition can significantly improve your dog’s visibility at night, making it a worthwhile customization.
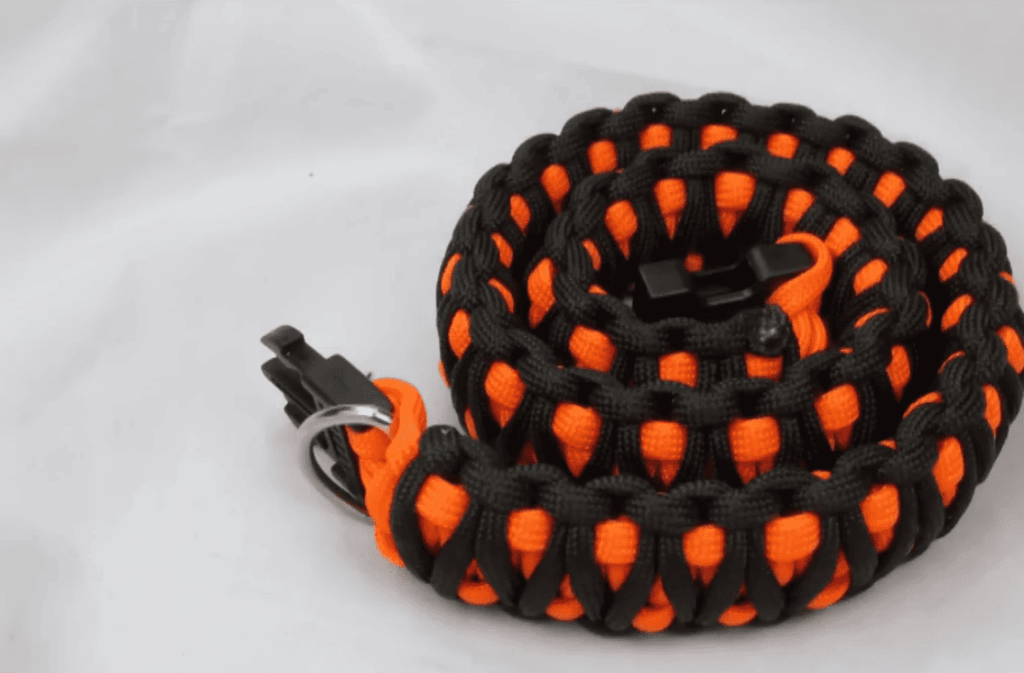
Incorporating Multiple Colors
Using multiple colors can make your paracord dog collar truly unique. You can choose colors that match your dog’s personality or your personal style. Experiment with different color combinations to create a one-of-a-kind design. For instance, alternating between two or more colors in your weave pattern can create a striking visual effect.
Consider using colors that complement each other or match your dog’s coat. This will not only make the collar visually appealing but also personalized to your dog.
Adding Personalized Name Tags
A personalized name tag can add a special touch to your paracord dog collar. You can engrave your dog’s name, your contact information, or a fun message on the tag. Attaching a name tag is straightforward; simply thread it onto the collar before finishing the ends. This not only personalizes the collar but also adds an extra layer of safety.
When choosing a name tag, consider the material and design. You can opt for metal, plastic, or even engraved wooden tags. The key is to ensure it’s securely attached and clearly legible.
Creating Matching Leash Sets
For a coordinated look, consider creating a matching leash to go with your paracord dog collar. Using the same paracord material and weave pattern for both the collar and leash creates a cohesive and stylish set. This is a great way to showcase your crafting skills and provide your dog with a matching set that’s both functional and fashionable.
To create a matching set, simply replicate the weave pattern and design elements from the collar to the leash. This will create a harmonious and stylish look that’s sure to turn heads.
| Customization Idea | Description | Benefits |
|---|---|---|
| Reflective Tracers | Add reflective material to the paracord weave | Increased visibility at night, added safety |
| Multiple Colors | Use different colors in the weave pattern | Unique design, personalization |
| Personalized Name Tags | Engrave and attach a name tag to the collar | Personal touch, added safety with contact info |
| Matching Leash Sets | Create a leash with the same paracord and weave | Coordinated look, showcases crafting skill |
Common Mistakes to Avoid
To ensure your paracord dog collar is both functional and durable, it’s crucial to steer clear of frequent mistakes. Making a paracord dog collar involves several key considerations, from measuring your dog’s neck to selecting the right hardware.
Making the Collar Too Tight or Too Loose
One of the most critical aspects of making a paracord dog collar is achieving the perfect fit. A collar that is too tight can be uncomfortable for your dog, while one that is too loose may slip off. To avoid this, follow the two-finger rule: the collar should be snug but allow for two fingers to fit between the collar and your dog’s neck.
- Measure your dog’s neck accurately to determine the correct size.
- Adjust the collar’s length according to your dog’s breed and size.
Inconsistent Weaving Tension
Inconsistent weaving tension can lead to a collar that is uneven and potentially weak. Maintaining even tension throughout the weaving process is crucial for both the appearance and durability of the collar.
- Keep the paracord taut but not too tight as you weave.
- Regularly inspect your work to ensure consistency.
Improper End Sealing
Properly sealing the ends of your paracord dog collar is vital to prevent fraying and ensure longevity. Using a lighter or heat source can effectively melt and seal the paracord ends.
- Use a lighter to carefully melt the ends, avoiding damage to the surrounding material.
- Ensure the melted ends are smooth and not overly charred.
Using Low-Quality Hardware
The hardware used in your paracord dog collar, such as buckles and D-rings, should be durable and of high quality. Low-quality hardware can lead to a collar that breaks or malfunctions.
- Select hardware that is rust-resistant and sturdy.
- Consider the size and weight of your dog when choosing hardware.
By avoiding these common mistakes, you can create a paracord dog collar that is not only stylish but also safe and durable for your pet. Remember, no collar is indestructible, so regular inspection and maintenance are key to ensuring your dog’s safety.
Maintenance and Care for Longevity
A well-maintained paracord collar not only lasts longer but also keeps your dog safe and comfortable. To achieve this, it’s essential to follow a few simple care and maintenance steps.
Cleaning Your Paracord Collar Safely
Cleaning your paracord collar regularly is vital to remove dirt and grime that can weaken the cord over time. To clean your paracord collar safely:
- Use mild soap and lukewarm water.
- Gently scrub the collar with a soft-bristled brush.
- Rinse thoroughly to remove any soap residue.
- Allow the collar to air dry completely before using it again.
Avoid using harsh chemicals or machine washing, as these can damage the paracord material.
Inspecting for Wear and Damage
Regular inspections are crucial to identify any signs of wear and damage early on. Check your paracord collar for:
- Fraying or cutting of the paracord.
- Loose or damaged buckles.
- Signs of excessive wear on the D-ring.
If you notice any damage, consider repairing or replacing the affected parts to maintain the collar’s integrity.
When to Replace Your Handmade Collar
Despite regular maintenance, there comes a time when your paracord collar needs to be replaced. Consider replacing your collar if:
- The paracord is significantly frayed or damaged.
- The buckle or D-ring is broken.
- The collar no longer fits your dog comfortably due to growth or weight changes.
Replacing your collar ensures your dog’s safety and comfort.
Proper Storage Between Uses
When not in use, store your paracord collar properly to prevent unnecessary wear. Here are some tips:
- Hang the collar in a dry, cool place.
- Avoid coiling the collar too tightly, as this can cause creasing.
- Keep the collar away from direct sunlight to prevent color fading.
By following these storage tips, you can help extend the life of your paracord collar.
Conclusion
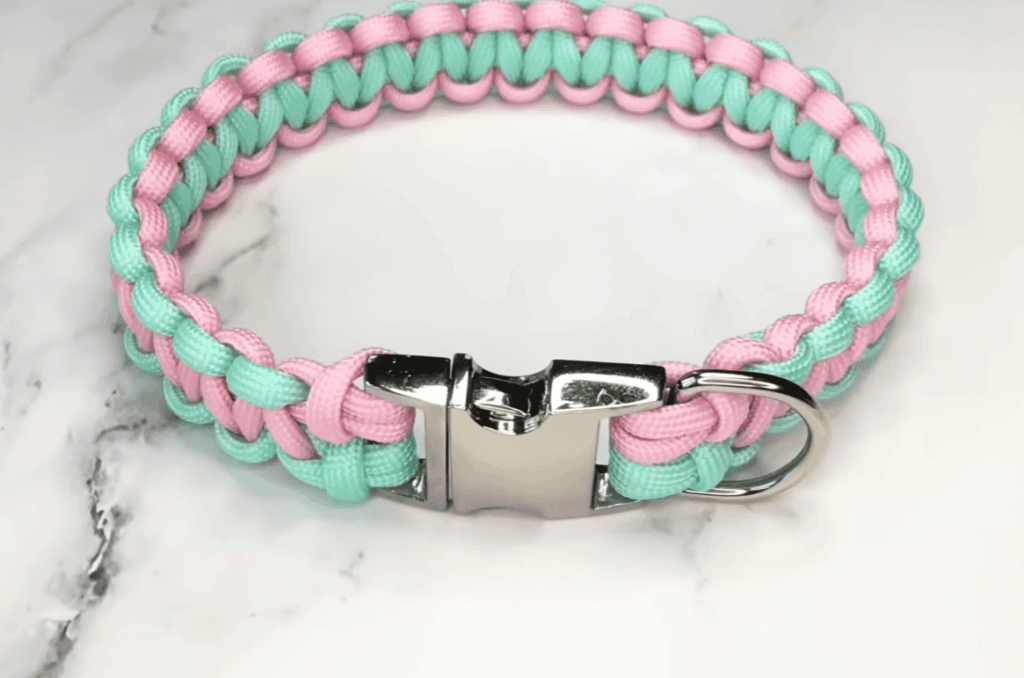
By following this comprehensive guide, you’re now equipped to craft a paracord dog collar that not only reflects your dog’s personality but also stands the test of time. The process of making a paracord dog collar is a rewarding DIY project that combines functionality with personalization.
A well-made paracord dog collar offers unmatched strength, durability, and style, making it a valuable investment for any dog owner. As you conclude your project, you’ll appreciate the cost-effectiveness and customization possibilities that this DIY approach provides.
With your newfound skills, you can experiment with various weaving patterns, colors, and designs to create unique accessories that suit your dog’s needs. The paracord dog collar conclusion is just the beginning – you can apply these skills to other DIY projects, exploring the endless possibilities of paracord crafting.
Embark on this DIY journey and enjoy the satisfaction of creating something truly special for your pet. A paracord dog collar is more than just an accessory; it’s a testament to your creativity and dedication to your dog’s well-being.