Did you know that nearly 60% of pet parents experience immediate stress when their training gadgets start acting up? It is a common feeling, especially when observing a specific light pattern on your pet’s device. Sophisticated technology should ideally assist our lives, rather than complicating them.
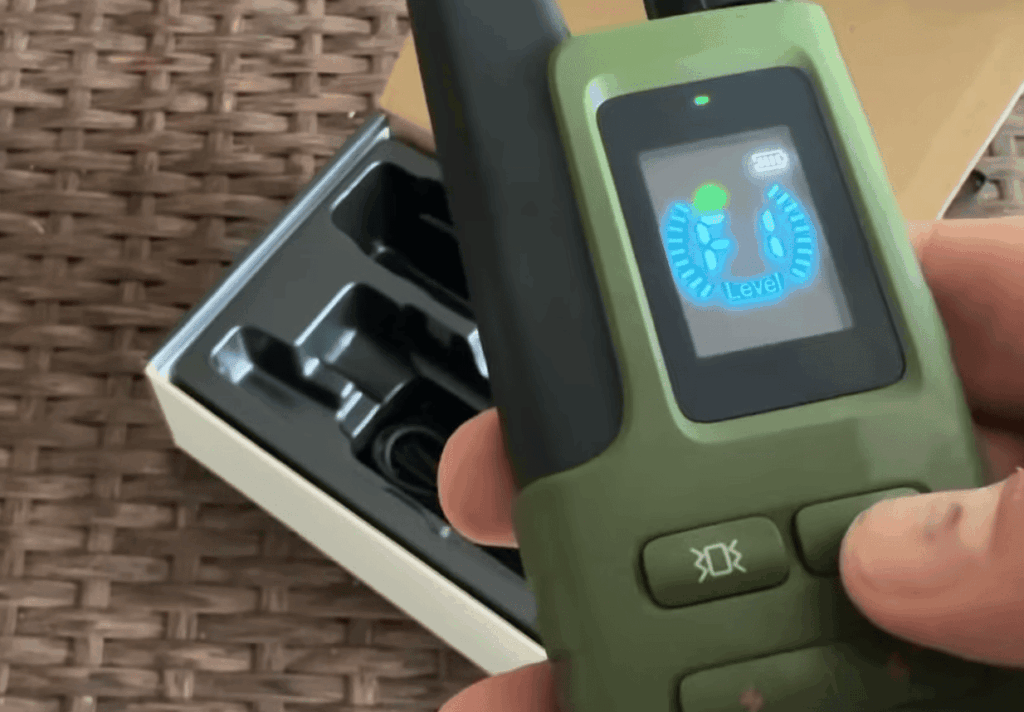
Seeing a blinking green indicator might feel confusing at first. This signal usually suggests that the electronic unit is active or perhaps searching for a connection. You are likely here because your dog shock collar is doing something unexpected presently.
Rest assured that most modern equipment includes these visual cues for your benefit. These specific indicators provide immediate updates regarding battery longevity or signal strength. Your bond with your pet remains the most important part of this process.
Don’t worry, as these minor technical complications often have straightforward solutions. We shall explore effective troubleshooting methodologies immediately. Understanding these signals ensures your furry friend stays safe while your training remains consistent and positive.
Key Takeaways
- Flashing lights often signal power status or synchronization modes.
- Many common problems resolve with a battery check or reboot.
- Referencing the manual clarifies brand-specific light sequences.
- Steady maintenance prevents most technical glitches.
- Safety remains the priority during any electronic adjustment.
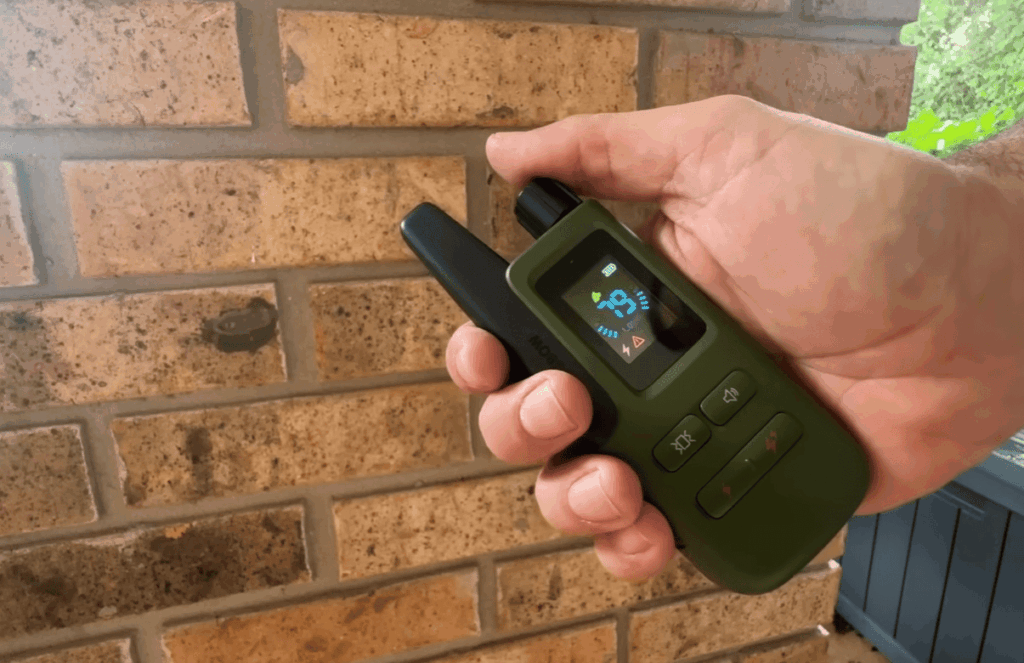
Understanding Your Dog Shock Collar’s Light Indicators
The light indicators on your dog shock collar are more than just a simple status check; they provide valuable insights into the device’s operation. According to the INVIROX user guide, understanding these indicators is crucial for the effective use of the dog shock collar.
Why Manufacturers Use Light Signals
Manufacturers use light signals on dog shock collars to convey important information about the device’s status, such as power levels, operational mode, and potential issues. This visual feedback is essential for users to understand whether the collar is functioning correctly or if there’s a need for adjustment or repair.
Common Light Colors and Their Meanings
Different light colors on a dog shock collar typically signify various states or alerts. For instance, a steady green light might indicate that the device is powered on and functioning normally, while a blinking red light could signal a low battery or a problem with the collar’s operation. Understanding these color codes is vital for interpreting the collar’s status accurately.
The Importance of Reading Your User Manual
While general knowledge about light indicators can be helpful, it’s crucial to read the user manual specific to your dog shock collar model. The manual will provide detailed explanations of the light signals used by your particular device, ensuring you can interpret them correctly and use the collar effectively.
What Does a Blinking Green Light Mean on Your Collar?
A blinking green light on your dog shock collar can be puzzling, but understanding its meaning is crucial. The significance of this indicator varies across different models and brands.
Normal Operating Mode Indicators
In many dog shock collars, a blinking green light signifies that the device is functioning correctly and is in normal operating mode. For instance, some models use a blinking green light to indicate that the collar is properly paired with the transmitter.
Error and Warning Signals
However, a blinking green light can also serve as an error or warning signal. It might indicate low battery levels or a malfunction within the system. “A green blinking light can sometimes mean the device is experiencing a technical issue,” as noted by a leading manufacturer.
Brand-Specific Green Light Meanings
Different brands have unique interpretations for their light indicators. For example, some brands might use a steady green light for normal operation and a blinking green for pairing mode.
Continuous Blinking vs. Intermittent Flash Patterns
The pattern of the blinking light can also provide insight. A continuous blink might signify a different status compared to an intermittent flash. Understanding these patterns is key to diagnosing the issue.
By deciphering the meaning behind the blinking green light on your dog shock collar, you can take appropriate action, whether it’s checking the battery, re-pairing the device, or consulting the user manual.
Common Causes Behind
A blinking green light on your dog shock collar can be triggered by several factors, ranging from simple battery issues to complex software glitches. Understanding these causes is crucial for effective troubleshooting.
The INVIROX user guide and other sources highlight several potential causes, including low battery and pairing issues, which are common culprits behind the blinking green light.
Low or Depleted Battery Power
One of the most common reasons for a blinking green light is low battery power. If your dog shock collar is not holding a charge or is not charged properly, it may indicate this through a blinking green light.
Poor Connection Between Receiver and Transmitter
A poor connection between the receiver (collar) and transmitter can also cause the green blinking light. This could be due to interference or a malfunction in either device.
Pairing or Synchronization Issues
If the collar and transmitter are not properly paired or synchronized, it can lead to a blinking green light. Re-pairing the devices may resolve this issue.
Firmware Glitches and Software Errors
Sometimes, firmware glitches or software errors can cause the blinking green light. Checking for firmware updates or performing a reset may help.
Environmental Interference Factors
Environmental factors, such as other electronic devices or physical barriers, can interfere with the collar’s operation, leading to a blinking green light.
- Check for nearby devices causing interference
- Ensure the collar is used in an appropriate environment
Initial Quick Checks Before Starting Repairs
Before diving into complex repairs, it’s essential to perform some initial checks on your dog shock collar. These preliminary steps can often resolve the issue or provide valuable insights into the problem.
Inspecting the Collar for Visible Damage
First, remove the collar from your dog and inspect it for any visible signs of damage, such as cracks, breaks, or corrosion. Check the prongs and the main body of the collar for any wear and tear that could be causing the blinking green light.
Checking Battery Levels on Both Units
Ensure that both the remote and the collar are fully charged. A low battery can often cause malfunctioning or erratic behavior. Check the user manual for charging instructions specific to your model.
Verifying Proper Power-On Status
Confirm that both the transmitter and receiver are turned on and functioning correctly. Sometimes, a simple power cycle can resolve connectivity issues.
Testing the Remote Control Functionality
Test the remote control to see if it’s working as expected. Check if the buttons are responsive and if the collar reacts to commands. If the remote is not functioning, it could indicate a pairing issue or a hardware problem.
By performing these initial checks, you can identify and potentially fix simple issues, or you can gather more information to guide further troubleshooting steps.
Dog Shock Collar Blinking Green: How to Fix Battery Issues
If your dog’s shock collar is blinking green, it’s likely due to a battery issue that you can easily resolve. Battery-related problems are common and can often be fixed with simple troubleshooting steps.
Properly Charging Your Dog Shock Collar
First, ensure you’re charging your dog shock collar correctly. Use the charger provided by the manufacturer and follow the recommended charging time. Avoid overcharging, as it can reduce battery lifespan.
Replacing Batteries with Correct Specifications
If charging doesn’t resolve the issue, you may need to replace the batteries. Make sure to use batteries that match the specifications recommended by the manufacturer.
Cleaning Battery Contacts and Charging Ports
Dirty contacts can prevent the collar from charging properly. Clean the battery contacts and charging ports gently with a soft brush or cloth.

Recognizing Signs of Battery Failure
Signs of battery failure include a rapid blinking light, failure to hold a charge, or the collar not turning on. If you notice any of these signs, it’s likely time to replace the battery.
Testing Battery Voltage with a Multimeter
For a more precise diagnosis, you can test the battery voltage using a multimeter. Compare the reading to the manufacturer’s specified voltage to determine if the battery is functioning correctly.
| Issue | Possible Cause | Solution |
|---|---|---|
| Blinking Green Light | Low Battery | Charge the collar |
| Failure to Hold Charge | Battery Failure | Replace the battery |
| Dirty Contacts | Poor Connection | Clean the contacts |
Fixing Connection and Pairing Problems Step-by-Step
Troubleshooting connection and pairing issues with your dog shock collar is a straightforward process when done step-by-step. Connection issues can arise due to various reasons such as interference, distance limitations, or improper pairing. To resolve these issues, follow the steps outlined below.
Re-Pairing the Receiver Collar with the Transmitter
Re-pairing the devices can often resolve connectivity issues. The INVIROX user guide provides detailed steps for pairing the remote transmitter and receiver collar. Generally, this involves turning off both devices, then turning them back on and following the manufacturer’s instructions for pairing.
- Turn off both the transmitter and receiver collar.
- Turn them back on and put them in pairing mode as per the user manual.
- Follow the on-screen instructions or LED indicators to complete the pairing process.
Reducing Electronic Signal Interference
Electronic signal interference can disrupt the connection between the transmitter and receiver collar. To minimize this, try the following:
- Move away from other electronic devices that could be causing interference.
- Check for any physical obstructions between the transmitter and receiver.
- Reset the devices to their default settings.
Understanding Distance Limitations and Range Issues
Dog shock collars have a specified range within which they operate effectively. Exceeding this range can cause connection issues. Check your user manual to understand the maximum range and try to stay within it.
Testing the Collar in Different Locations
Testing the collar in various locations can help identify if the issue is location-specific. Try using the collar in open areas, near buildings, and in areas with dense foliage to see if the connection improves or deteriorates.
Checking Antenna Positioning and Condition
The condition and positioning of the antenna on both the transmitter and receiver collar can significantly affect the connection. Ensure that the antennas are not damaged and are properly positioned.
By following these steps, you can identify and potentially fix connection and pairing problems with your dog shock collar.
Performing a System Reset on Your Dog Collar
When your dog shock collar starts blinking green, it can be a sign that something needs attention, and performing a system reset might be the solution. A system reset can often resolve issues related to the collar’s functionality, ensuring it works correctly and safely.
When to Consider a Reset
You should consider resetting your dog collar if you’ve noticed persistent issues that haven’t been resolved through basic troubleshooting. Common scenarios include when the collar is not responding to the remote control or when it’s displaying an error signal like a blinking green light.
Soft Reset Procedures for Minor Issues
A soft reset is typically the first step in troubleshooting. This usually involves turning the collar off and then back on again. For some models, you might need to press and hold a specific button until the lights flash in a particular pattern, indicating the reset is in progress.
Hard Reset or Factory Reset Instructions
If a soft reset doesn’t work, you may need to perform a hard or factory reset. This process varies by manufacturer but often involves pressing a combination of buttons or using a specific sequence to restore the device to its original settings. Be sure to consult your user manual for the exact procedure.
Reprogramming Settings After a Reset
After resetting your dog collar, you’ll need to reprogram the settings to match your dog’s training needs. This includes adjusting the stimulation levels, tone, and vibration settings as necessary. Take this opportunity to review and adjust the settings to ensure they’re appropriate for your dog.
By following these steps, you can effectively troubleshoot and potentially resolve the issue with your dog shock collar’s blinking green light.
Advanced Troubleshooting for Persistent Green Blinking
When your dog shock collar continues to blink green despite basic troubleshooting, it’s time to dive into advanced troubleshooting techniques. Persistent issues often indicate a need for more in-depth examination and repair.
Updating or Reinstalling Firmware
One of the first advanced steps is to check if your dog shock collar’s firmware is up to date. Firmware updates can resolve known issues and improve the collar’s functionality. Check the manufacturer’s website for update instructions and follow them carefully.
Testing Individual Collar Components
Inspecting the collar’s components can help identify the source of the problem. Look for signs of wear or damage on the receiver, transmitter, and contact points. Ensure all parts are clean and functioning correctly.
Identifying and Addressing Water Damage
Water damage can cause malfunctions. If your collar has been exposed to water, check for corrosion or mineral deposits. Cleaning or replacing damaged components may be necessary.
| Troubleshooting Step | Action | Expected Outcome |
|---|---|---|
| Firmware Update | Follow manufacturer’s update instructions | Resolved known issues, improved functionality |
| Component Inspection | Inspect for wear or damage | Identification of faulty components |
| Water Damage Check | Look for corrosion or mineral deposits | Determination of need for cleaning or replacement |
Using Manufacturer Diagnostic Tools
Some manufacturers provide diagnostic tools or apps that can help identify issues with your dog shock collar. Check the user manual or manufacturer’s website for more information.

Contacting Technical Support Effectively
If all else fails, contacting the manufacturer’s technical support can provide a solution. Be prepared to provide details about your collar and the steps you’ve taken so far.
When You Should Replace Your Dog Shock Collar
Knowing when to replace your dog’s shock collar is crucial for their safety and your peace of mind. Over time, these devices can deteriorate or become less effective, necessitating a replacement.
Clear Signs Your Collar Has Failed
If your dog shock collar is consistently malfunctioning, such as a blinking green light that doesn’t stop, it may be a sign that the device has reached the end of its lifespan. Other signs include a failure to deliver the intended stimulus or a significant decrease in the collar’s range.
Comparing Repair Costs vs. Replacement
In some cases, repairing the collar might be more cost-effective than replacing it. However, if the repair costs are close to or exceed the price of a new collar, replacement is likely the better option.
The following table summarizes key factors to consider when deciding between repair and replacement:
| Factor | Repair | Replacement |
|---|---|---|
| Cost | Lower upfront cost | Higher initial cost |
| Reliability | May not be as reliable | Comes with a warranty |
| Latest Technology | May not have latest features | Includes latest features and improvements |
Understanding Warranty Coverage and Claims
Before replacing your dog shock collar, check if it’s still under warranty. Many manufacturers offer warranties that cover defects and certain types of malfunctions.
Choosing a Reliable Replacement Collar
When selecting a new collar, consider factors such as the size and temperament of your dog, the training features you need, and the manufacturer’s reputation for producing reliable products.
Preventing Future Green Light Problems
Maintaining your dog shock collar is essential for its longevity and performance. A well-cared-for collar not only ensures effective training but also prevents issues like the dreaded blinking green light. The INVIROX user guide emphasizes the importance of proper care and maintenance of the dog shock collar.
Establishing a Regular Maintenance Schedule
Regular checks can help identify potential issues before they become major problems. It’s recommended to inspect your collar every few weeks, or more frequently if used daily.
Proper Cleaning and Care Techniques
Cleaning the collar regularly is vital. Use a soft cloth and mild soap to wipe down the device, paying extra attention to the contacts and charging ports.
Correct Storage Practices Between Uses
Store the collar in a cool, dry place, away from direct sunlight. Avoid storing it with other electronic devices to minimize interference.
Battery Care and Timely Replacement
Monitor battery levels closely and replace batteries as needed. Using the correct type and specifications is crucial.
Avoiding Common User Mistakes
Common mistakes include overcharging, not updating firmware, and ignoring user manual guidelines. Being aware of these can significantly reduce the risk of malfunction.
| Maintenance Task | Frequency | Importance Level |
|---|---|---|
| Inspect Collar | Every 2 weeks | High |
| Clean Collar | Monthly | Medium |
| Check Battery | Weekly | High |
Safety Tips When Troubleshooting Your Dog’s Collar
When troubleshooting your dog’s shock collar, safety should be your top priority to avoid any potential harm to your pet. Troubleshooting can sometimes involve testing the collar’s functions, which requires careful handling to prevent accidental shocks or other injuries.
Always Remove the Collar from Your Dog First
Before starting any troubleshooting, ensure the collar is removed from your dog. This prevents any accidental activation of the shock or vibration function, which could startle or harm your dog.
Testing Shock Levels Safely Before Reuse
If you’re testing the shock level, do so carefully. Use a safe and controlled environment, and consider using a tester device if provided by the manufacturer. Never test the shock on yourself or others.
Monitoring Your Dog for Signs of Discomfort
After reattaching the collar, observe your dog closely for any signs of discomfort or stress. If your dog shows signs of distress, such as whining, panting, or avoiding the area where the collar is worn, consider consulting a professional.
Knowing When to Consult a Professional Trainer
If you’re unsure about any aspect of troubleshooting or if your dog continues to exhibit behavioral issues despite correcting the collar’s function, it may be time to consult a professional dog trainer. They can provide guidance tailored to your dog’s specific needs.
Ensuring Proper Fit After Repairs
After troubleshooting and potentially repairing the collar, ensure it fits your dog properly. A poorly fitting collar can cause discomfort or reduce the effectiveness of the training.
Conclusion
Troubleshooting a dog shock collar blinking green can be a straightforward process when approached methodically. By understanding the meaning behind the blinking green light and following the steps outlined in this article, dog owners can identify and potentially fix the issue.
From checking battery levels and connections to performing system resets and updating firmware, the troubleshooting process involves a series of simple checks. Regular maintenance, such as cleaning the collar and checking for damage, can also help prevent issues.
By taking the time to understand and address the root cause of the blinking green light on their dog shock collar, owners can ensure their pet’s training and safety are not compromised. Effective troubleshooting not only resolves the immediate issue but also helps to maintain a strong bond between dog and owner.